Staff Answer
Aug 17, 2026 - 07:15 PM
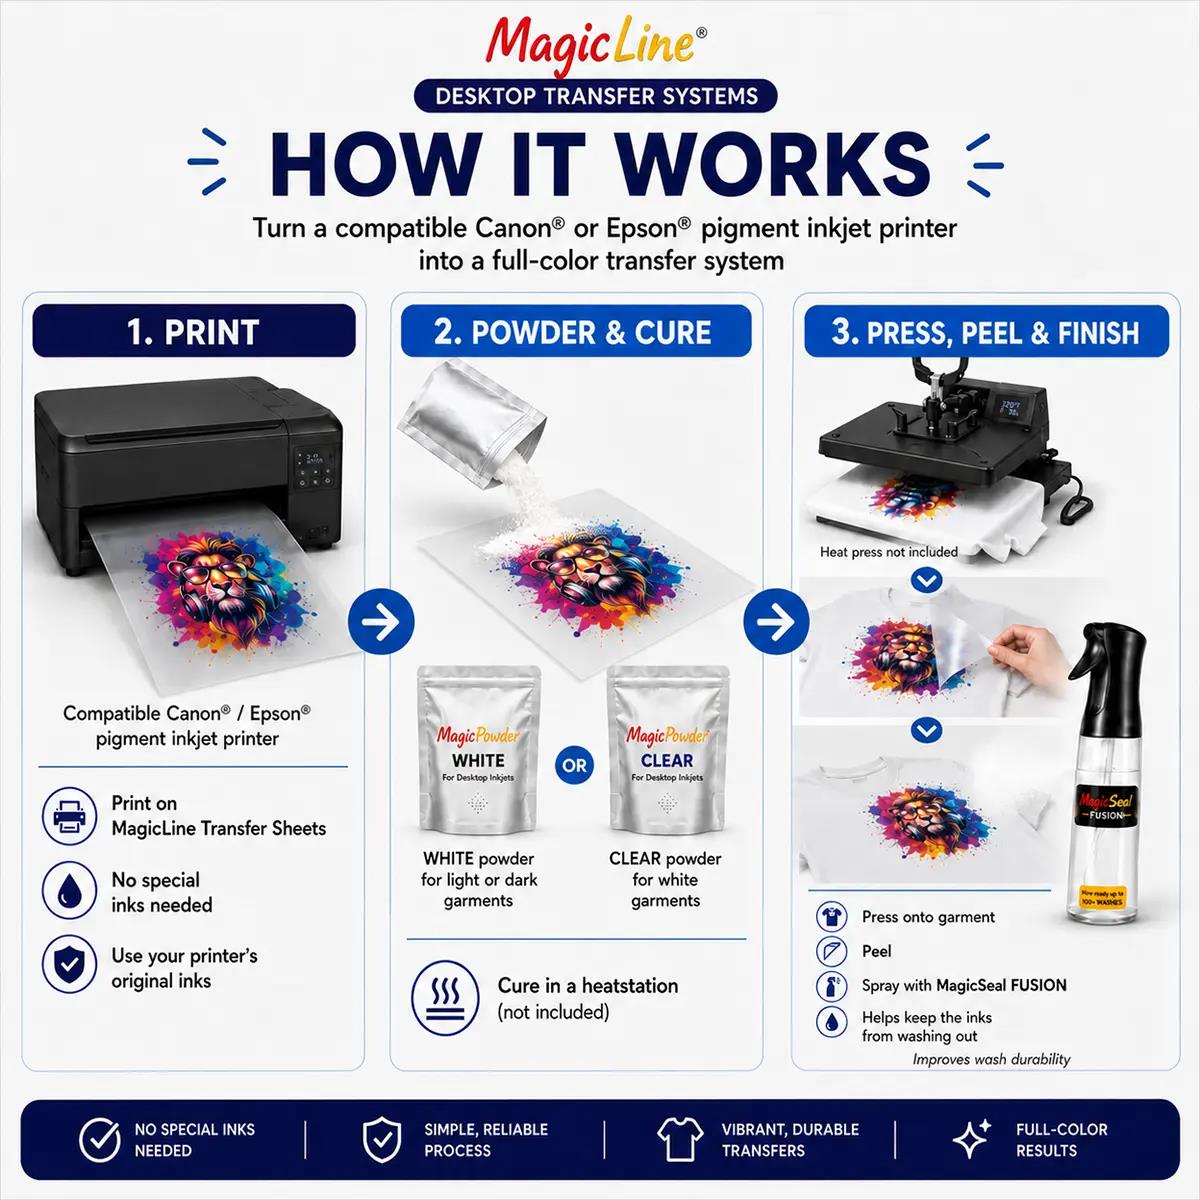
Start by preparing your artwork and mirror the design before printing. Print onto the semi-matte, frosted side of the MagicLine Transfer Sheet. Because the Epson WF-3820 rollers may not reliably grip the transfer film by itself, attach the transfer sheet to a clean sheet of standard copy paper, with the shiny side against the copy paper and the printable semi-matte side exposed. Secure the two sheets together along the short leading edge that will enter the printer first. Load the assembly with the transfer sheet facing DOWN, the white carrier paper facing UP, and the taped edge entering first.
Immediately after printing, apply MagicPowder evenly over the wet printed design and gently remove any excess powder. Use WHITE MagicPowder for white, light, colored, or dark garments when an opaque white backing is desired. Use CLEAR MagicPowder primarily for white garments, where additional white opacity is not needed.
Next, cure the powdered transfer using the recommended curing equipment and settings. Once cured, position the transfer on the garment with the printed/powdered side facing DOWN against the fabric, then heat press using the recommended temperature, time, and pressure for the garment.
These are cold-peel transfers, so do not peel the film immediately. After pressing, allow the transfer to cool for approximately 15-20 seconds, then slowly peel the film away from the garment. If any part of the design begins to lift, stop peeling, place the film back down, and repress as needed.
After peeling, complete the MagicLine process with MagicSeal Fusion. Lightly mist the printed design from approximately 10 inches away, using about 1-2 sprays for smaller designs or 2-3 sprays for larger designs. Do not oversaturate. Cover the design with the supplied Teflon or appropriate protective sheet and perform the final 15-second finishing press. This final step helps improve the transfer’s softness, flexibility, wash durability, and overall finished appearance.